Grano Arso Pasta inspired by Chef Patti Jackson

All culinary and artisan roads lead to Jimmy Carbone, the owner of Jimmy's No. 43; a Slow Food approved restaurant and craft beer bar in the East Village of New York City. Thankfully, Jimmy's is a five minute walk from my New York City apartment, as their Monday night prix fixe dinner series is about imbibing craft beers with a chef prepared, locally focused meal that is not to be missed; especially if Chef Patti Jackson, formerly of iTrulli, is cooking.

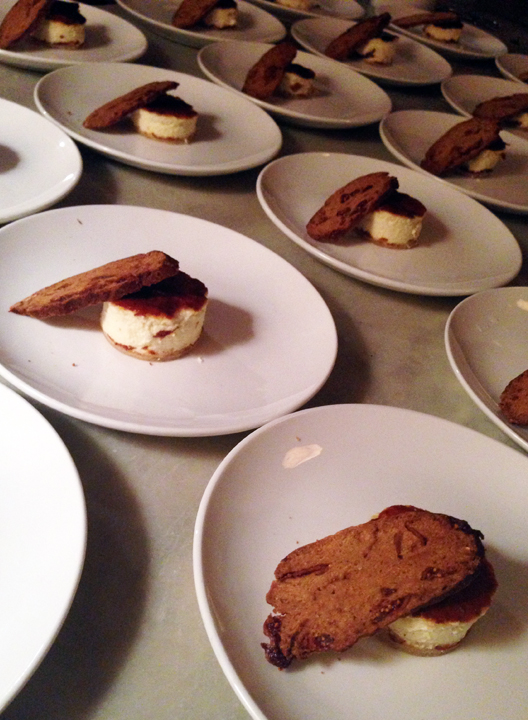
In 2011, I met chef Jackson at my first Cassoulet cooking competition at Jimmy's No. 43. She was stationed right next to me and I was so excited to meet the chef of iTrulli, as I thought her talent for developing Italian fare, especially her pasta, was right on.​ I am very much inspired by chef Jackson and have been fortunate enough to indulge at a few of these dinners: Spanish tapas paired with hard ciders and Spanish beers of Iberian United, Vegetarian Nonsense™ Dinner paired with Italian craft beer curated by B. United, and most recently April Sours, featuring lambic and sour beers paired with a special tasting menu which included:

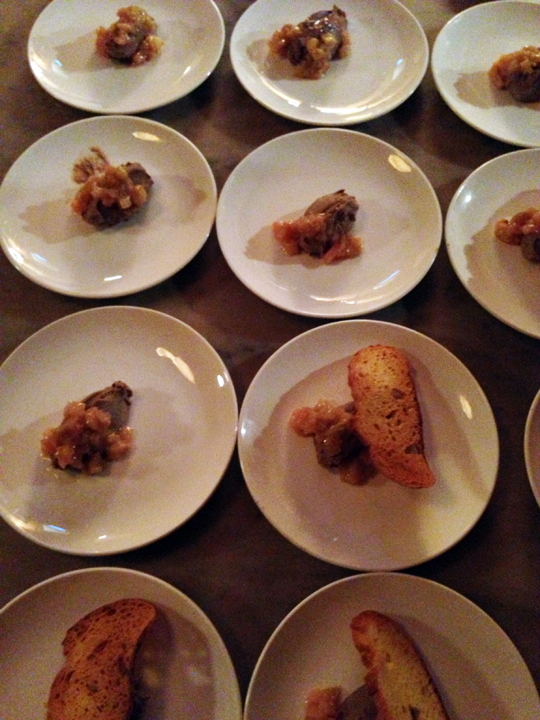
  • Chicken Liver Pate, Rhubarb Relish paired with Hanssens Gueuze
  • Smoked Mackerel Salad with Cress and Rye Crumbs paired with Alvinne Wild Undressed
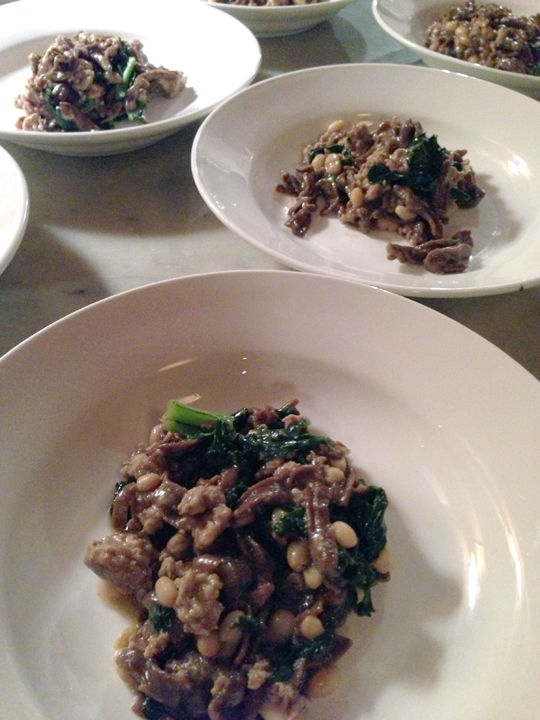
  • Burnt-flour Pasta with Duck Sausage and White Beans paired with Vapeur, Vintage
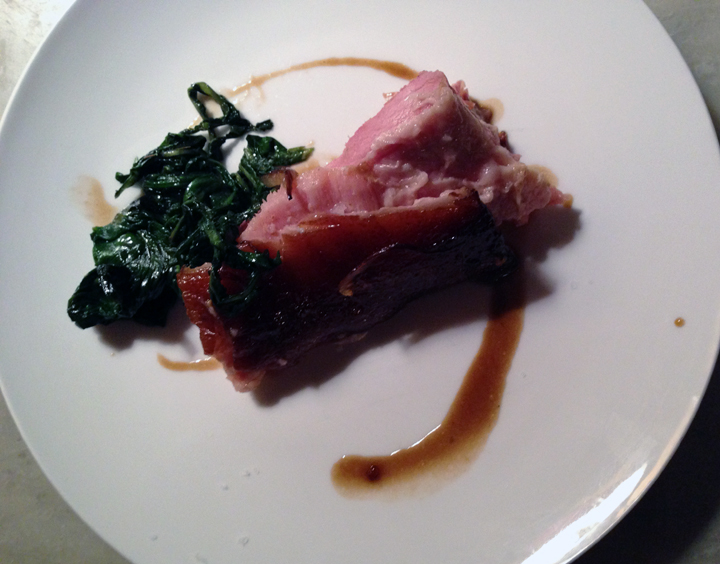
  • Braised Bacon, Braised Spring Greens and Ramps paired with Vapeur Cochonne 1996
  • Savory Cheese Tart, Fig and Cardamon Toast paired with Alvinne Cuvee Freddy

I have eaten and made my fair share of pasta, but I have never heard of the burnt flour type, known as, grano arso, which means burnt grain. Grano arso originated in the region of Puglia as cucina povera, or "cuisine of poverty". There’s more than one story about the origin of using grano arso. Some say hungry peasants scoured freshly burned wheat fields seeking overlooked scorched stubbles, while another theory suggests that villagers would sweep their communal wood-burning ovens to collect the burnt flour that was left behind after baking bread. Today, burnt grain is not a necessity for survival, but of interest to the experimental cook or chef like Patti Jackson.

I was so inspired by chef Jackson's burnt flour recipe that I experimented the following day in my kitchen and followed her technique.​ 

Tagliatelle di Grano Arso with Spring Peas, Asparagus and Caramelized Onions

Chef Jackson made a Maccheroncini pasta which are pasta tubes, that she cut into 1-inch pieces. I decided to make a Tagliatelle pasta that are long and flat which held the ingredients nicely. ​My burnt flour could have taken another 5 minutes in the oven, however, my smoke detector was not happy, alarming me of when it thought the flour was done, so I had to stop. Be sure to open the windows or us your oven vents. The flavor of the burnt flour pasta is exactly like charred pizza dough and the color — a dark, toasted amber similar in color to cocoa powder.


Grano Arso

ingredients

  • ​1 cup; durum flour

directions

  1. Preheat oven to 400°
  2. Spread flour on a baking sheet and bake for 30 - 40 minuets; until dark in color and charred on the edges.​
  3. Remove from oven and let cool. Sieve in a bowl; reserve.

Tagliatelle di Grano Arso

ingredients

  • 1 cup; grano arso
  • 3 cups; durum flour
  • 1 cup; hot water

Note: for this recipes 2 pieces of dough was used. The remainder you can freeze, 1 -3 months.

directions

  1. ​Place grano arso and flour in the bowl of a stand mixer fitted with dough hook.
  2. Slowly add the hot water and mix until moist and capable of sticking together
  3. Remove dough from mixer and place on a lightly floured work surface; knead by hand to form an elastic ball and divide into 4 pieces and cover with plastic wrap.
  4. Flatten your 1 piece of dough a little and feed it through the machine, set to #1.
  5. Fold the dough in half and feed it through the machine again, still on #1.
  6. Repeat this process around 10 times.
  7. Change your setting to #2 and feed it through the machine once. No need to fold the dough in half again.
  8. Using the Tagliatelle pasta attachement feed the pasta through, lightly flour pasta on a baking sheet and let dry for 15 minutes.
  9. Continue with Step 1-8 with the remaining pasta pieces.

Assembly

ingredients

  • 1 cup, spring peas
  • 12 stalks of asparagus, cut into 1/2 inch pieces 
  • 1 large onion, thinly sliced
  • 3 tablespoons of olive oil
  • 1 tablespoon of unsalted butter
  • 3/4 cup of grated Pecorino cheese
  • 1 tablespoon of cracked black pepper
  • Generous amount of salt for the pasta water and for blanching the peas and asparagus.
  • 1 cup of reserved pasta water

directions

  1. Over medium heat in a wide skillet add 1 tablespoon of butter and 1 tablespoon of olive oil. Add the onion and caramelize until golden brown; set aside.
  2. Bring a medium size pot of salted water to a boil and add the peas and cut asparagus; blanch for 2 minutes; strain and reserve.

    note: before cutting asparagus snap off the woody base of each spear by bending the spear a few times to find a place where it breaks easily.
     
  3. Place vegetables with the caramelized onions and lightly fold together over low heat; reserve.​
  4. Bring a large pot of salted water to a boil; cook until al dente, for about 3 minutes; remove pasta with a wide strainer and place in the pan with the vegetables.
  5. Add 1 cup of the reserved pasta water, 2 tablespoons of olive oil and 3/4 cup of grated pecorino cheese.; gently fold together.
  6. Place in a bowl or serving dish and lightly sprinkle with pecorino cheese.

Chikapalooza - The Basics of Raising Chickens

The Garden of Eve's first Chikapalooza was a great way to kick-off Earth Day and to celebrate spring. Throughout the weekend there were cooking demonstrations and information about their Community Supported Agriculture (CSA) as well as workshops for creating an organic home garden, shearing wool, working with bees, and the highlight of my visit, raising chickens.

At a very young age birds have always been a part of my life. My father raised a hundred or so canaries that started out in the basement of our house and eventually made its way to the outdoor shed. At the crack of dawn, just when the sun peeked it's way through the window, the canaries would sing the longest and most beautiful melody you have ever heard. My father always had an affinity for birds, and even tried a hand at raising chickens for eggs years ago, until the town put a stop to his love affair. Thankfully, the Chicken Laws and Ordinances have evolved since then.

Four years ago, when my husband Chris and I bought our 1.1 acre lot in Hampton Bays, New York my father's first thought was, "Chickens, you can raise chickens!"  Our first thought, "We need to build a house." 

We are 3.5 months away from Sheridan Green being complete and all I can think about is raising chickens for eggs. We have not picked out our kitchen appliances yet and I'm fantasizing about the design of our chicken coop and the young Araucanas, Bantams and Top Hats frolicking around our property.

While Chris was busy being Architect and General Contractor for Sheridan Green, I was on my way to Chikapalooza, to understand the basics of raising chickens.

Dr. Mark Bridgen, Professor and Director of the Long Island Horticultural Research and Extension Center at Cornell University led the seminar. 

Dr. Mark Bridgen, Professor and Director of the Long Island Horticultural Research and Extension Center at Cornell University led the seminar. He has been raising his own chickens for more than 25 years and is an authority on the care and management of chickens in the home. 

Here are some of my top takeaways from the seminar:

  1. How to begin? First research your Chicken Laws and Ordinances. It is important to understand your zoning restrictions and to think about your neighbors.
  2. What kind of chickens should you get? There are different chicken breeds for meat, eggs, pets and show birds. Determine your purpose for chickens and then pick your breeds. Starting with baby chicks ensures a "cleaner" flock from potential diseases and easier adaptation to you and their new environment.
  3. Where to get Chickens?​ You can mail order chicks from Cackle Hatchery and Murray McMurray Hatchery. During the springtime you can get chicks at your local feed stores. Locally for Long Island residents you can call Long Island Hatchery at 631.457.0612.
  4. What to do when baby chicks arrive?​ It is best to be prepared before your chicks arrive. You'll need a chick brooder and flooring of pine shavings. The easiest way to make sure your chicks stay warm is to provide them with a heat lamp indoors at a temperature of 90 to 100 degrees for the first week from a single lamp. Decrease 5 degrees per week until the chick is 4 weeks old. Special feed of "crumbles" or "mash" and fresh water is imperative.
  5. Do you need a rooster to get eggs? No. You would only need a rooster if you want to raise your own chicks. If you want a rooster you need to be considerate of your neighbors as they are extremely loud.
  6. Where to keep Chickens?​ In a chicken coop; general rule 2 or 3-square-feet for each chicken. A sturdy, well ventilated and protected structure which is raised off the ground is best to keep predators from getting in. One nesting box for every 2-3 hens. Chickens need exercise, fresh air and room to roam safely. If you are fencing in a chicken run which is attached to your coop each chicken needs approximately 4-square-feet. 
  7. What to feed Chickens?​ Adults get vegetarian, no-antibiotic feed which you can get at any Agway (NOT their normal Agway brand feed - which has antibiotics and animal by products in it). Locally for Long Island residents: Neptune Feed, 631.369.0965 and East Port Feed, 10 bag-pellet quantities only. 631.325.0077. Chickens will eat your vegetable scraps/compost, lawn clippings, bugs, ticks and worms. Fresh water daily is a must.
  8. How many eggs will you get?​ 200-300 eggs per year per chicken. Hens naturally lay eggs when the days are long, and slow down as the days grow short in the wintertime. If you want your hens to lay eggs throughout the winter add a 40-watt bulb for 100-square-feet (10- by 10-foot) or 60-watt bulb for 200-square-feet (20- by 20-foot) suspended about 7 feet off the floor to substitute for daylight.
  9. Common Chicken Predators:​ Cats, Dogs, Foxes, Hawks, Owls, Raccoons and Rats. The chickens will naturally go into their coop at dusk and you must lock the chickens in so no predators can enter the coop. Put sturdy wire metal screens on all of your chicken house windows and use a good grade wire with small openings. Instead of letting the chickens roam freely, build a wire-enclosed chicken run next to your coop and make sure to put a top on it.
  10. Why would you want to raise chickens? fun, easy, fresh eggs and pet-friendly. 

​Chris, Garden of Eve's Farmer gave me a tour of their "Egg mobiles"

After the seminar, I went to see how the Garden of Eve pastures their 1,500 chickens in their custom-built "eggmobiles" that are out in the fields, and moved every 3 weeks to new "pasture". ​Pastured poultry is a sustainable agriculture technique that calls for the raising of laying chickens on pasture, as opposed to indoor confinement. They eat grass, just like a cow, in addition to their no-antibiotic, all vegetarian grain pelleted feed and bugs within the field. Pastured chicken eggs have alot more flavor than store-bought. The yolk is bright orange and higher in Omega-3's due to the chlorophyll in the greens the chickens eat.

North Fork Hen House Tour

​For those of you who are looking to create your own hen house or simply curious about chicken coops in general, there will be a self-guided tour of the North Fork Hen Houses on Saturday, June 15, 2013 from 103 p.m. This is organized by Cornell University's Long Island Horticultural Research and Extension Center, to celebrate hometown hen houses, and to share enthusiasm for raising chickens. 

Some of the stops on the tour include: a small family-run farm that sells eggs and chickens all year, a supplier of baby chicks, a perennial plant grower that has ducks, geese, and chickens, a homemade hen house with a green roof and families who raise chickens for fresh eggs and more.

Participants will pick up their maps at Cornell University's Long Island Horticultural Research and Extension Center at 3059 Sound Avenue, Riverhead, New York 11901. There will be a $5 fee per vehicle to obtain a map.

If you have a hen house that you are especially proud of and are willing to be one of the sites on the tour, please call Dr. Mark Bridgen ​at: 631.727.3595 or e-mail: mpb27@cornell.edu.

Did you know?
That ​Suffolk County is the most Agricultural county in the State of New York based on wholesale valu
e. No other county in New York is more important or more diverse. 

To visit the Garden of Eve Organic Farm & Market: 4558 Sound Ave, Riverhead New York 11901 www.GardenOfEveFarm.com  phone: 631.722.8777.

Spring Greens Soup with a Poached Farm Egg

Spring is all about green shoots and new growth. The quintessential gastronomic sign of an early spring is young fresh green garlic and green shallots that are harvested before the cloves have begun to mature. The season for these mild flavored alliums is short, so sauntering to your local farmers market to snatch up these mild but distinct flavored beauties is not recommended. 

Spring Greens Soup with a Poached Farm Egg Recipe

ingredients

  • 1/2 pound of young green garlic, outer layer peeled and chopped
  • 1/2 pound of young green shallots, chopped
  • 1 cup of parsley
  • 2 cups of watercress
  • 2 cups of radish greens
  • ​1 large onion, chopped
  • 1 medium potato, peeled
  • 8 cups of chicken or vegetable stock
  • 1 tablespoon of unsalted butter
  • 2 tablespoons of olive oil
  • ​1 tablespoon of fresh thyme
  • 2 tablespoons of sour cream
  • Salt and pepper to taste
  • chives, snipped for garnish

    poached egg

  • Fresh farm eggs (1 for each bowl)​
  • 3 tablespoons of white wine vinegar
  • directions

    1. Melt the butter and olive oil in a medium stockpot set over medium-low heat. Add the young green shallots and garlic, watercress, radish greens, onion and potato.
    2. Stir occasionally, until softened, about 20 minutes. Then add the parsley and thyme.​
    3. Add 8 cups of stock and bring to a boil.​
    4. Add the sour cream and with a hand held immersion blender puree in the stockpot. Add salt and pepper to taste.

      poached egg

    5. Half-fill a wide pan about 4 inches deep, with unsalted water. Add 3 tablespoons of white wine vinegar and bring to a boil.
    6. Break an egg into a small bowl. Stir the water clockwise so it is moving and then gently tip the egg into the pan. The circular movement helps the egg white to gather into a ball.​
    7. Poach egg for 1 1/2 minutes.​
      (if you like your poached egg to be firmer, cook for 2 minutes.
    8. With a slotted spoon lift the egg out of the pot and rest the bottom of the spoon on a paper towel to absorb some of the liquid.
    9. Place the poached egg in the center of a shallow soup bowl.
    10. Ladle the hot soup around the poached egg, carefully not to cover or pierce it. Garnish with snipped chives.
    note: Do not poach more than 4 eggs at a time, to prevent over crowding and breakage.